Thursday, 12 November 2009

Pattern Development


At this stage, i have completed a sketch model and tested it on the site. i now have a wider view of turning an object into a field and how to deal with a large site area, to create interesting spacing. I now have to start thinking about a "system"

Some images of the pattern 3d- model on the site model.


I took the lines from my pattern and built a 3-d sketch cardboard model to see how my 2d pattern would look in 3d.


As a group we have divided the site into 5 strips and applied our patterns on to it. To start engaging with the environment and understand our pattern on a bigger scale as well as a bigger area (field).


Finally, i started looking at the pattern more as a field and i will now start applying the lines onto a bigger scale to test the spaces that could be created within it.


Cells have been moved at a specific rule, creating clusters in different areas.

Those previous lines rule have created some enclosed cells (shapes), here i have offset those shapes creating empty spaces between them.
My next step was finding a new pattern within the chosen developed pattern. And i have experimented by finding similar continuous lines running through the pattern vertically.

Sunday, 8 November 2009

The Ideal City

Task:

Envision a city ideal!

What makes a city?

What distinguishes urban from for

example rural communities?

Describe this ideal in spatial terms this ideal!

What is the minimal set of parts that

constitute a city?
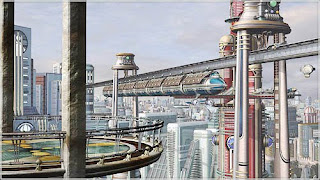


An ideal city is one that has a good plan, one that is sustainable and fast, one that has a strategic location and good transportation, a city that doesn’t have any economical or agricultural problems. An ideal city is its people, people who bring life, vitality and business to the city. It is ideal when there is consistent growth and movement. And in spatial content it is ideal when its buildings shape the public spaces creating a combination between open and closed, negative spaces for movement and positive for habitat, It is ideal when that city could easily adapt to change and should be planned in the sense that no matter how dense its population is you never feel it is crowded, narrow or small.

The ideal city may also be something that is extremely futuristic as in the cartoon the “Jetsons Family” where there are flying cars and robots. A city = A machine. I think the city in 30 years time would be something similar but not to that extreme. Maybe not flying cars but rather no car at all, a city where the pavement is a flat escalator for example, one that has many levels, many movable bridges and tunnels.
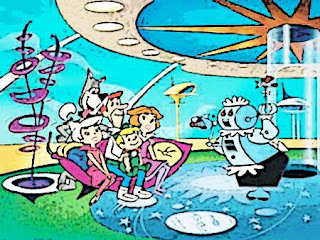


What makes a city is basically the infrastructure and public utilities to survive that city. It should have a certain population density and should generate a certain income and environmental aspects to sustain itself. What distinguishes urban communities from rural is the way of life and the communities’ mentality, along with the population density and financial importance. The minimal set of parts that constitute a city are population, infrastructure and public utilities. Part of being a city in my sense is the streets => (movable platforms), the community => (Happy people), the fumes =>(Green aspects), dirt and pollution => (clean), and finally the regeneration => (development).

Tuesday, 27 October 2009

The High Tide

I have visited the site when the tide was high, and it was quite incredible how this environmental aspect has a great effect on the overall conception of our site. everything felt high as i walked around the O2 arena. its like, as the water line increases becoming higher all the surrounding objects seem to float with it. Below are some pictures:


Thursday, 22 October 2009

Patterns


Turning the 2d pattern into 3d model: i have tried some techniques and experimented my pattern in many different ways.


layering


Extruding lines

Clusters of box shapes.


Step 3: Coloring, Trying to find some repeated shapes to help me look at it in 3D as the next step is modeling the pattern.
Step Two: moving intersecting points upwards and downwards.

Step One: Rotating the 2nd grid line by 10 degree angle to the left and the forth grid line by same angle but to the right continuously along the pattern.


At this point i have decided to go back to the original pattern and experiment on it.
Trial 2: Elimination and color addition, in this pattern i tried removing all the lines that are inside the big hex shapes and coloring the small ones.
Trial 1: Distorting the pattern, i started looking at grid lines and thought of ways in changing them to create a totally new distorted pattern. I have moved every 2nd grid line from right to left on top of the one adjacent.
Developing the pattern below, by making it more random where the small shapes interconnect with the middle and big shaped hexagon. it was created by surrounding the medium sized one with small hex and the Big sized ones surrounded by medium ones.


I have generated 5 new patterns out of the one by Ekrem Yalcindag:


Size Variation: I have created this pattern by arranging the bigger box shapes in the centre and making them smaller as they move away from the centre. each variation in size is rescaled by half.


Seeing the Pattern as 6 diamond shapes that create a flower, i have changed the rule by reducing the number of diamonds by half. 6 => 3


This pattern was created by taking the 5 different shapes, looking at them as different sized boxes and arranging them randomly by mostly considering that it starts with bigger shapes repeated on each raw by moving them a step backwards then at a certain point it shifts where the smaller sized boxes start moving forward.


Taking those 5 different sized hex an make them overlap: second raw goes a step backwards from the first and the third steps forward from the second... and so on


Creating a new pattern by changing the length size of the hexagonal shapes, as they start being small and enlarge in length as they repeat vertically upwards.


After studying the patterns i have realised that there are many rules and ways of describing how a certain pattern has been created there is no 'one rule'...'the rule behind it' but it depends on each person's perspective and how each one of us would see patterns in a different ways. here are some examples of how i read patterns and my analysis of understanding how they were generated:


Paper and String, 2002 by Rinzen
This pattern is based on repeating 4 different shapes in one raw, then that raw shifting one shape to the right creating a new raw below, then another raw is created by shifting the whole thing back to starting point (so one shape to the left)...etc.
process 4 (form 2), 2005 by Casey Reas

This pattern was quite exciting as I've realised that connecting the dots of a starting point of a radiation of lines on the pattern, different sized triangles start to appear.

schloss Balmoral 3 (balmoral Castle 3), 2001-2002 by Ekrem Yalcindag


This pattern appears to have hexagonal shapes overlaying the one adjacent by its 1/3rd, or might just be boxes repeated horizontally and moved a step backwards when repeated vertically.

L-Raster, 2003 by Peter Zimmermann


This pattern has been generated by overlaying 3 different coloured dots that vary in size in different areas: the yellow layer seem to have bigger sized dots in the middle area of the pattern and they become smaller towards the edges. The blue layer on the other hand, has the smaller size dots in the middle and the bigger ones covering the rest of the pattern while finally, the red layer doesn't seem to vary much in size but maybe similar to the blue its small size dots tend to be concentrated in the middle area.


Marble Floor by Wim Delvoye
This pattern has been generated by repeating the flower shape over and over from all sides.


Signature 2, 2002 by Susanna Paesler


This pattern was created by repeating a certain sized circle vertically, And increases gradually in size. So, moving horizontally the circles becomes bigger and bigger.